

Custom Brother PJ Printer Settings designed by (me) Paul Talbot.
They’re all designed to simplify the task of dialling in your PJ. Forget the setup hassle and start making perfect stencils today.
These files (once installed) reset all your Brother PJ Printer Settings and adjust only the ones that effect the process of making stencils for Tattooing. Just set it and forget about it.
The Brother PJ Stencil printer isn’t designed for the job we use it for. There is a learning curve to this piece of hardware and you’ll need to engage your brain when using it. Not just blindly stumble along mashing buttons and throwing tantrums when ‘it’ doesn’t work. With our brains engaged and our big boy pants on lets proceed.
COMBINE WITH A 12V POWER SUPPLY
For the best results I recommend using a 3rd part power supply. Stencil paper is much lighter than the fax paper that your Brother was originally designed to print onto so combine these with my recommended 12v 2 amp adapter (that you can buy here). Then you’ll have a bulletproof setup that won’t eat paper or jam up. All without losing the 300 x 300 dpi quality that these amazing – game changing – devices offer.
- PJ723 – USB only
- PJ763 – USB or bluetooth via Print & Scan
- PJ773 – USB or wifi via Print & Scan
- Decompress the downloaded .ZIP archive
- Connect your machine to a PC or a Mac Via USB.
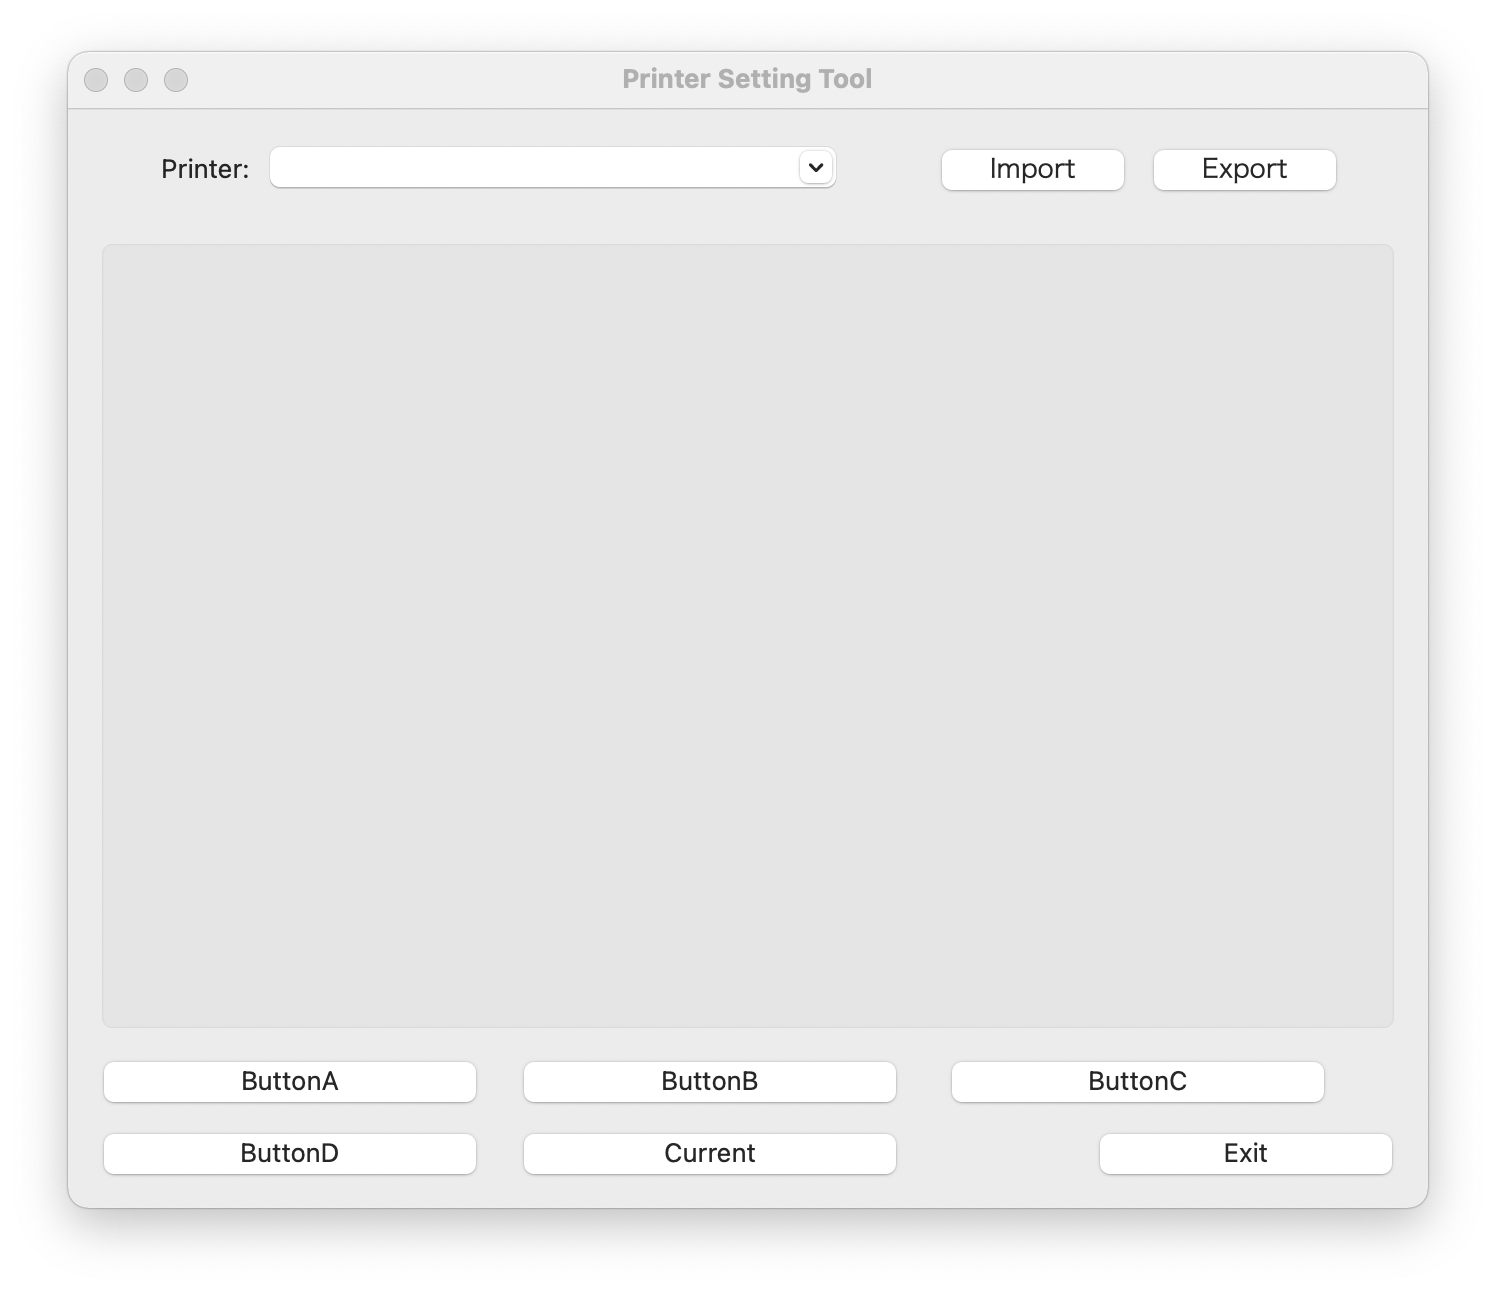
- Open the Brother Printer Setting Tool
- Click ‘Import’ and navigate to your downloads folder. (See image below)
- Import the Mac .plist file or WIN .dat file
- Follow the onscreen prompts
- You’re done. Happy Stencilling!
INSTALLATION FAILED MESSAGE
- In certain circumstances the import will fail. I’m not a programmer and honestly I’m not sure why it sometimes won’t work.
- If you experience this simply open the .PDF file included in the download and manually input them. It only takes a minute and you’ll only have to do it once.
PJ Setup & Usage TIPS
I’m going to use the 723 for my examples as the setting can easily be accessed from your graphic softwares print dialog box. All these settings work in exactly the same way from machine to machine.
For the purpose of tattooing there’s really no relevant settings in the basic tab so we’ll just skip it and go to the advanced tab.
The advanced tab is where we might want to make some changes to get the best stencil.
For old school tattoos suit used the old thermo-fax think of density as heat. The higher the number the hotter the PJ will print. 0 is coldest 10 is hottest.
Print Speed is the one that confuses a lot of people. Mostly because they don’t understand what effect that has on the printing. We send an image to the PJ and a printhead inside the machine heats up and transfers that heat to the stencil paper. The faster the speed the less time the paper will spend going across the print head. The faster you print it the lighter the stencil, the slower you print see the darker the stencil. The difference between really fast and really slow isn’t exactly massive but it does help if you get a slightly problematic stencil.
The next three options are the the ones that make a big difference to your tattoo stencils. They basically tell the printer how to handle the image it has to print and what to do with ‘grey’ information.
This first option is the one I use all the time. ‘Logo and text’ tells the printer to print black and ignore grey. Think photocopier. The printer looks at the image and goes ‘if it’s black I’ll print it. If it’s grey I won’t print anything at all.
Dither is an intentionally applied form of noise used to randomise quantisation error preventing large-scale patterns such as colour banding in images. Basically what all that technobabble means is that the printer is going to take the image that you send it and apply an algorithm to the black and grey values. Turning into something that looks like the image. That’s not going to be any good as a tattoo stencil.
Error Diffusion is a type of half toning in which the quantisation residual is distributed to neighbouring pixels that have not yet been processed. This essentially means that the printer will apply a different algorithm to the black and grey values for a smoother looking printed image. Fine for faxes but not for stencils.
You might be thinking “that’s what I was told the PJ could do when I bought it and that’s why I bought it. Because you can just print any image straight from Google, chuck it on the skin and five minutes later be tattooing?” “It’s supposed to be a huge timesaver”.
It may seem like it at first but a quick stencil isn’t actually a timesaver. Anytime that you ‘save’ by printing an image directly from Google will be lost is the stencil becomes unreadable during the tattoo session. It’s almost impossible for any current stencil fluid to ‘hold’ a image on the skin for hours without it blurring and wiping away.


